
Tiramisu Jars Recipe
Introduction
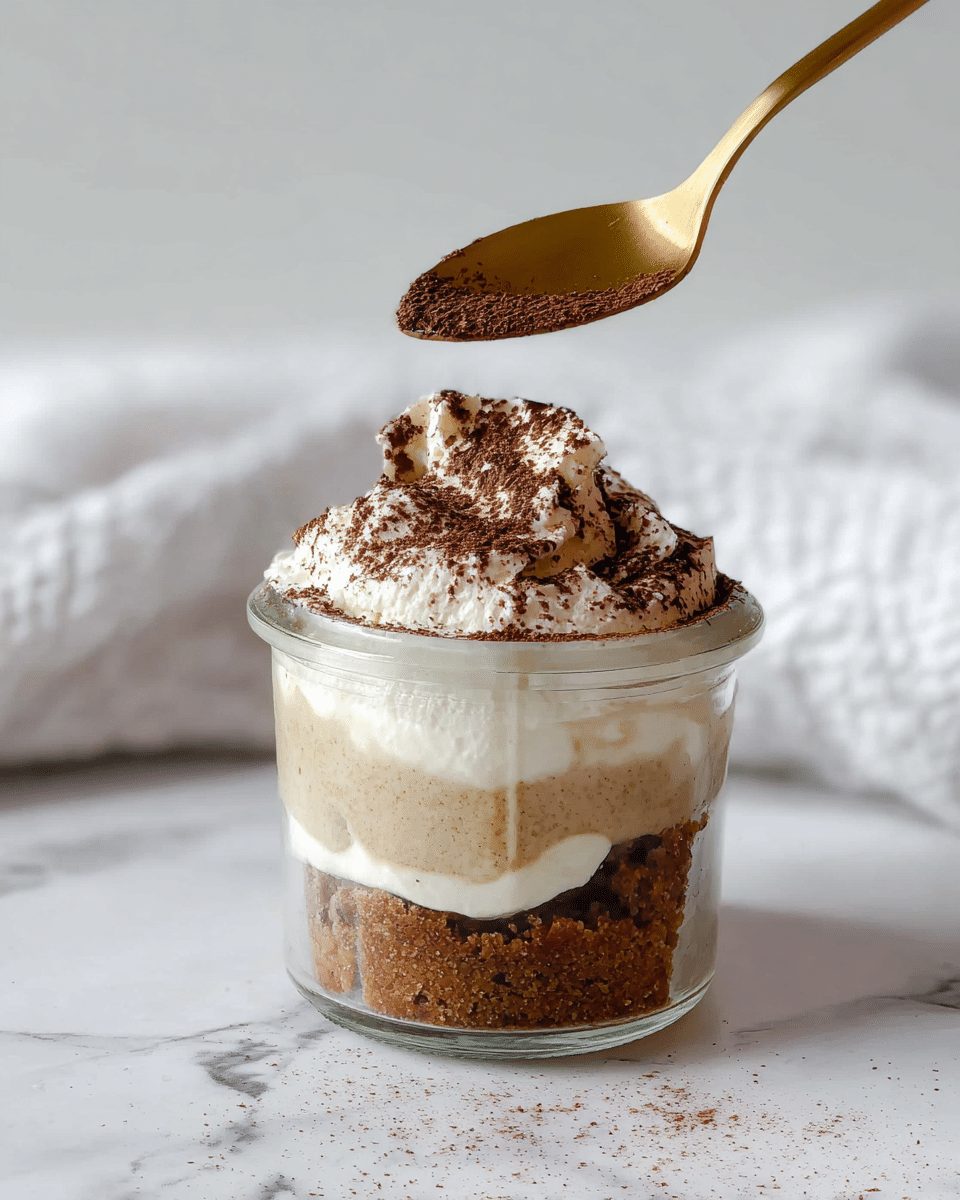
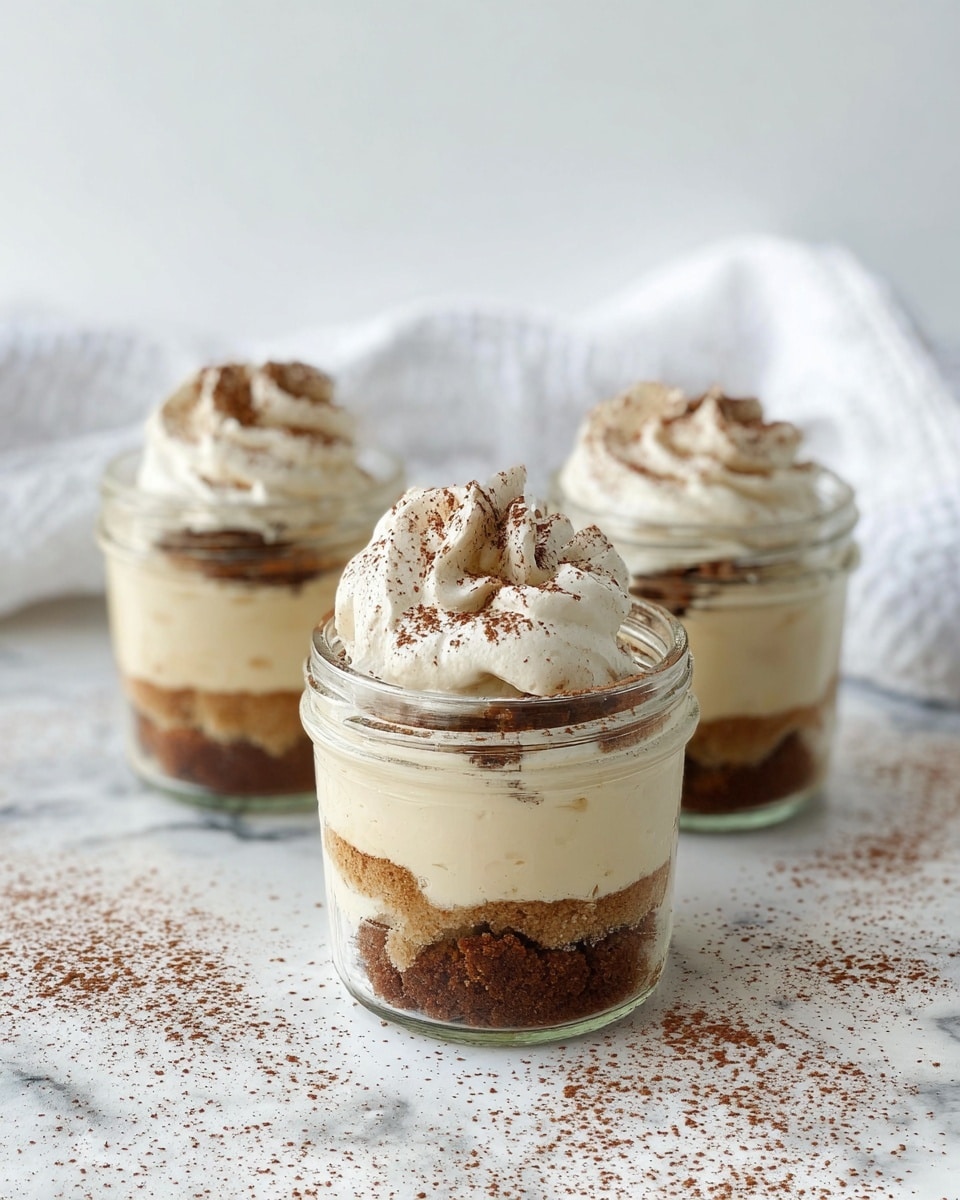
Tiramisu jars offer a delightful twist on the classic Italian dessert, perfect for individual servings. These portable treats combine rich espresso-soaked ladyfingers with creamy mascarpone and whipped cream, dusted with cacao powder for an elegant finish.
Ingredients
- 12 ladyfingers
- 1/2 cup espresso
- 1 cup mascarpone
- 1 cup whipped cream
- 1/4 cup cacao powder
Instructions
- Step 1: Gather all the ingredients and have your mini jars ready for assembly.
- Step 2: Briefly dip each ladyfinger into the espresso, ensuring they soak up the liquid but do not become too soggy.
- Step 3: In each jar, layer dipped ladyfingers at the bottom, followed by a layer of mascarpone, then a layer of whipped cream.
- Step 4: Repeat layering if the jars allow, finishing with a dusting of cacao powder on top.
- Step 5: Chill the jars in the refrigerator for at least 2 hours before serving to let the flavors meld.
Tips & Variations
- Use strong, freshly brewed espresso or a coffee substitute if preferred to enhance the flavor.
- For a boozy version, add a splash of coffee liqueur to the espresso before dipping the ladyfingers.
- Try topping with shaved dark chocolate or a few fresh berries for extra texture and visual appeal.
Storage
Store the tiramisu jars covered in the refrigerator for up to 3 days. Reheat is not recommended; enjoy chilled for the best texture and flavor.
How to Serve
Serve this delicious recipe with your favorite sides.
FAQs
Can I use regular cream instead of whipped cream?
Whipped cream provides the light, airy texture that balances the mascarpone. You can use regular cream but whip it before adding to keep the right consistency.
How long should I soak the ladyfingers in espresso?
Dip the ladyfingers quickly, about 1 to 2 seconds per side, so they absorb the espresso without becoming soggy and falling apart.
Print
Tiramisu Jars Recipe
- Total Time: 10 minutes (plus 1-2 hours chilling time)
- Yield: 6 servings 1x
Description
Delight in these easy-to-make Tiramisu Jars, a classic Italian dessert served in individual portions. Layers of espresso-soaked ladyfingers, creamy mascarpone, fluffy whipped cream, and a dusting of cocoa powder come together to create a luscious, no-bake treat perfect for any occasion.
Ingredients
For the Ladyfingers and Espresso
- 12 ladyfingers
- 1/2 cup espresso, cooled
For the Cream Layer
- 1 cup mascarpone cheese
- 1 cup whipped cream
For Topping
- 1/4 cup cocoa powder, for dusting
Instructions
- Gather Ingredients. Assemble all ingredients including ladyfingers, espresso, mascarpone, whipped cream, and cocoa powder to ensure you have everything ready for quick layering.
- Dip Ladyfingers. Briefly dip each ladyfinger into the cooled espresso to soak them slightly without becoming soggy, allowing the coffee flavor to infuse the cookies.
- Layer Ingredients. In individual mini jars or serving glasses, start by placing a layer of soaked ladyfingers at the bottom, followed by a layer of mascarpone cheese, then whipped cream. Repeat if jars are large enough, and finish by generously dusting the top with cocoa powder.
- Chill and Serve. Refrigerate the jars for at least 1-2 hours to meld flavors and achieve the best texture before serving. Enjoy your elegant and easy tiramisu jars!
Notes
- Use cooled espresso to prevent soggy ladyfingers and maintain the cream’s consistency.
- For a richer taste, mix a tablespoon of sugar or a splash of coffee liqueur into the mascarpone.
- Whipped cream can be homemade or store-bought, but freshly whipped cream provides better texture.
- These jars can be prepared a day in advance and stored covered in the refrigerator.
- Use unsweetened cocoa powder for dusting to balance the sweetness of the cream.
- Prep Time: 10 minutes
- Cook Time: 0 minutes
- Category: Dessert
- Method: No-Cook
- Cuisine: Italian
Keywords: tiramisu, dessert jars, no bake dessert, Italian dessert, mascarpone, coffee dessert


