
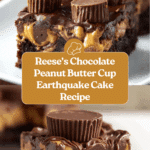
Reese’s Chocolate Peanut Butter Cup Earthquake Cake Recipe
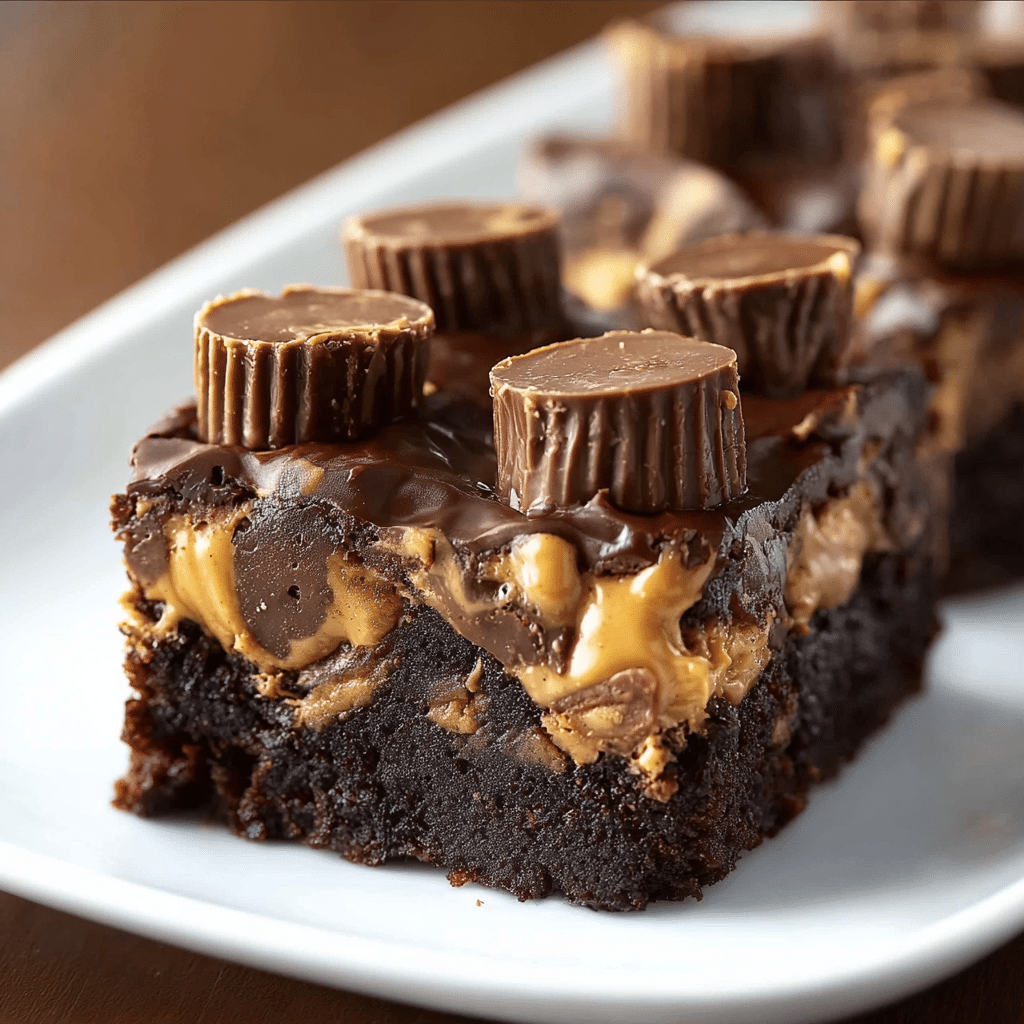
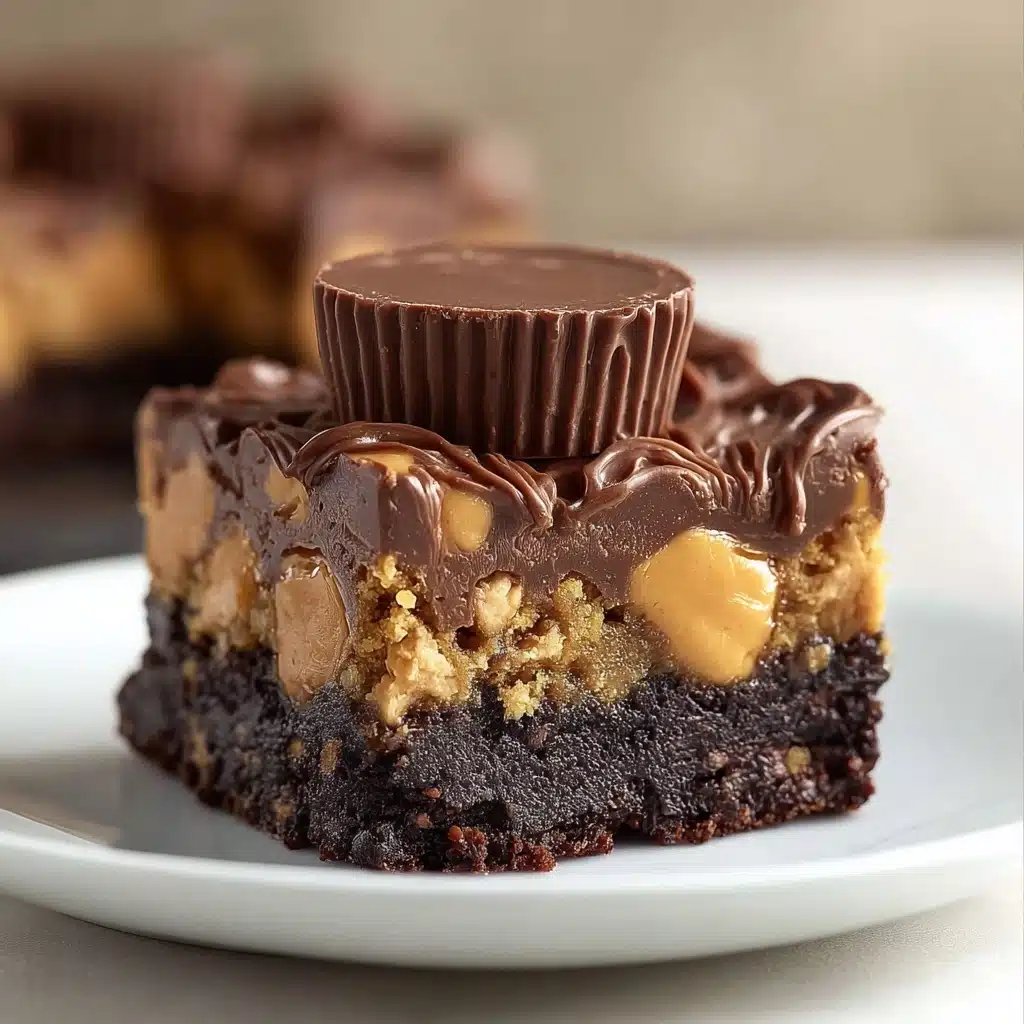
If you have a serious sweet tooth and an even bigger love for the perfect combination of chocolate and peanut butter, then the Reese’s Chocolate Peanut Butter Cup Earthquake Cake is about to become your new obsession. This dessert masterpiece brings together rich dark chocolate fudge cake with a luscious peanut butter cream cheese frosting, studded generously with those iconic Reese’s peanut butter cups and chocolate chips for extra bursts of flavor and texture. Every bite is like a delightful explosion of creamy, fudgy, and nutty goodness that will have you reaching for seconds (and maybe thirds). Trust me, once you experience the magic of this cake, it’ll be the star at every gathering and your go-to comfort dessert.
Ingredients You’ll Need
The ingredients to make this Reese’s Chocolate Peanut Butter Cup Earthquake Cake are wonderfully straightforward but powerful in creating layers of indulgence. Each item plays a crucial role in delivering that signature balance of moist cake, smooth frosting, and crunchy peanut butter cup surprises.
- 1 box dark chocolate fudge cake mix: Provides the rich chocolate base that’s moist and deeply flavorful, ensuring every bite is chocolate heaven.
- 8 oz cream cheese (softened): Adds tanginess and creaminess to the frosting, balancing the sweetness perfectly.
- 1/2 cup unsalted butter (softened): Brings richness and silkiness to the frosting’s texture.
- 1/2 cup creamy peanut butter: The star nutty flavor that complements the chocolate in an irresistible way.
- 1 tsp vanilla extract: Enhances all the other flavors with a warm, aromatic touch.
- 4 cups powdered sugar: Sweetens and thickens the frosting to that perfect spreadable consistency.
- 1/2 cup chocolate chips: For little pockets of melted chocolate goodness scattered on top.
- 1 cup miniature Reese’s peanut butter cups (halved): The addictive peanut butter and chocolate candy pieces that make this cake truly an “earthquake.”
- Vanilla ice cream (for serving): Optional but highly recommended for pairing, adding a creamy, cool contrast to the rich cake.
How to Make Reese’s Chocolate Peanut Butter Cup Earthquake Cake
Step 1: Preheat the Oven
Start off by heating your oven to 350°F (175°C). This gives it enough time to reach the perfect temperature for baking your cake evenly. Don’t forget to grease your 9×13-inch baking dish well with cooking spray or butter, so the cake comes out clean and beautiful.
Step 2: Prepare the Cake Batter
Grab a large mixing bowl and follow the instructions on your dark chocolate fudge cake mix box—usually, that means adding eggs, oil, and water and whisking it all together until smooth. Pour that luscious batter into your greased baking dish and spread it out evenly, setting the stage for a perfectly baked chocolate layer that will be the foundation of your Reese’s Chocolate Peanut Butter Cup Earthquake Cake.
Step 3: Make the Peanut Butter Cream Cheese Frosting
In a separate bowl, beat together the softened cream cheese, butter, creamy peanut butter, and vanilla extract until you get a silky, luscious mixture. Gradually add the powdered sugar, mixing thoroughly until the frosting is thick, smooth, and ready to spread. This frosting is what takes the cake from ordinary to extraordinary with its divine peanut buttery creaminess.
Step 4: Assemble the Cake
Spread the peanut butter cream cheese frosting evenly over the raw cake batter in your pan. Then, sprinkle the top with chocolate chips and halved miniature Reese’s peanut butter cups, pressing them gently into the frosting so they sink in slightly but still peek out. This layering is what creates the “earthquake” effect—a delightful mix of textures and bursts of flavor waiting to surprise you with every slice.
Step 5: Bake the Cake
Place your assembled masterpiece in the preheated oven and bake for 45 to 50 minutes. Use a toothpick inserted in the center to check doneness—it should come out clean. This slow baking lets the cake set while melding the cake and frosting layers beautifully without overbaking.
Step 6: Cool and Serve
Once baked, transfer the cake to a wire rack to cool completely. Cooling is key so the frosting sets nicely and the flavors meld together flawlessly. When ready, slice it up and serve it with a generous scoop of vanilla ice cream—it’s the perfect way to soak up the gooey richness of your Reese’s Chocolate Peanut Butter Cup Earthquake Cake.
How to Serve Reese’s Chocolate Peanut Butter Cup Earthquake Cake
Garnishes
Brighten up your presentation by adding extra chopped Reese’s peanut butter cups or a sprinkle of chocolate shavings on each slice. A drizzle of warm caramel sauce or a light dusting of cocoa powder can also add elegance and enhance the chocolate-peanut butter symphony that defines the Reese’s Chocolate Peanut Butter Cup Earthquake Cake.
Side Dishes
This cake is rich and satisfying on its own, but pairing it with a dollop of whipped cream, fresh strawberries, or a simple berry compote can cut through the richness and add a fresh contrast. Vanilla ice cream remains my top pick because of its creamy texture and mellow sweetness that perfectly complement the cake’s intensity.
Creative Ways to Present
For special occasions, serve the cake in elegant clear glass trifle dishes layered with more peanut butter cups and chocolate chips to make a delightful parfait version. Alternatively, cut the cooled cake into small bite-sized squares for party treats, placing a mini peanut butter cup on top of each for an adorable and delicious display that wows guests.
Make Ahead and Storage
Storing Leftovers
Once cooled, cover your Reese’s Chocolate Peanut Butter Cup Earthquake Cake tightly with plastic wrap or store it in an airtight container. It keeps best in the refrigerator for up to 4 days, allowing the flavors to deepen and the frosting to firm up while maintaining its moist, indulgent texture.
Freezing
If you want to save some for later, this cake freezes wonderfully. Wrap it tightly in plastic wrap and then aluminum foil to avoid freezer burn. Store it in the freezer for up to 2 months. When you’re ready to enjoy, thaw it overnight in the refrigerator—still just as delicious!
Reheating
Since it’s a frosted cake, it’s best served at room temperature or chilled. If you prefer it slightly warm, gently microwave individual slices for about 15 seconds to soften the cake layers without melting the frosting too much. Pair with ice cream for that perfect warm-and-cool combo.
FAQs
Can I use homemade chocolate cake instead of a box mix?
Absolutely! Homemade chocolate cake will work beautifully if you want to make the cake from scratch. Just make sure it’s a rich fudge-style chocolate cake to hold up well with the creamy frosting and Reese’s peanut butter cups.
Can I substitute peanut butter cups with regular-size Reese’s?
You can, but I recommend cutting them into smaller pieces or chopping them roughly so they distribute evenly throughout the frosting layer. The miniature size makes for a better textural experience throughout the cake.
Is this cake very sweet?
It is definitely on the sweeter side, but the tang from the cream cheese in the frosting helps balance that out nicely. If you prefer less sweetness, you can slightly reduce the powdered sugar in the frosting or serve smaller portions paired with unsweetened whipped cream or berries.
Can I make this cake vegan or dairy-free?
With some swaps like a vegan chocolate cake mix, dairy-free cream cheese and butter alternatives, and suitable peanut butter cups, you can create a vegan-friendly version, though the texture and flavor might vary slightly. It’s worth experimenting to match your dietary needs!
What is the best way to cut the cake without making a mess?
Use a sharp knife and warm it slightly by running it under hot water, then dry it off before cutting. This helps slice cleanly through the layers without tugging. Wiping the knife between cuts keeps the pieces neat and beautiful.
Final Thoughts
There’s just something magical about the Reese’s Chocolate Peanut Butter Cup Earthquake Cake that makes it impossible not to fall in love with. It’s the perfect canvas for chocolate and peanut butter lovers, blending rich textures and decadent flavors into one truly unforgettable dessert. If you’re looking to impress friends, treat yourself, or simply enjoy a slice of pure happiness, go ahead and give this cake a try—you might just discover your next favorite indulgence.
Print
Reese’s Chocolate Peanut Butter Cup Earthquake Cake Recipe
- Total Time: 1 hour 5 minutes
- Yield: 12 servings 1x
- Diet: Vegetarian
Description
Indulge in the ultimate chocolate and peanut butter delight with this Reese’s Chocolate Peanut Butter Cup Earthquake Cake. A rich dark chocolate fudge cake base is topped with a creamy peanut butter cream cheese frosting, sprinkled generously with chocolate chips and halved Reese’s peanut butter cups, then baked to perfection. Serve warm with vanilla ice cream for a decadent dessert experience.
Ingredients
Cake
- 1 box dark chocolate fudge cake mix
Peanut Butter Cream Cheese Frosting
- 8 oz cream cheese, softened
- 1/2 cup unsalted butter, softened
- 1/2 cup creamy peanut butter
- 1 tsp vanilla extract
- 4 cups powdered sugar
Toppings
- 1/2 cup chocolate chips
- 1 cup miniature Reese’s peanut butter cups, halved
For Serving
- Vanilla ice cream
Instructions
- Preheat the Oven: Preheat your oven to 350°F (175°C). Grease a 9×13-inch baking dish with cooking spray or butter to prevent sticking.
- Prepare the Cake Batter: In a large bowl, prepare the chocolate cake mix according to the package instructions, usually by adding oil, eggs, and water. Whisk until smooth and pour the batter evenly into the greased baking dish.
- Make the Peanut Butter Cream Cheese Frosting: In a separate bowl, beat together the softened cream cheese, butter, peanut butter, and vanilla extract until smooth and creamy. Gradually add the powdered sugar, mixing well until the frosting becomes thick and fluffy.
- Assemble the Cake: Spread the peanut butter cream cheese frosting evenly over the cake batter in the baking dish. Sprinkle the chocolate chips and halved Reese’s peanut butter cups on top, gently pressing them into the frosting to secure.
- Bake the Cake: Place the assembled cake in the preheated oven and bake for 45-50 minutes, or until a toothpick inserted into the center comes out clean. Be careful not to overbake to maintain moistness.
- Cool and Serve: Remove the cake from the oven and let it cool completely on a wire rack. Once cooled, slice and serve each portion with a scoop of vanilla ice cream for an extra indulgent treat.
Notes
- Use full-fat cream cheese and butter for the creamiest frosting.
- Miniature Reese’s peanut butter cups are easier to distribute and bake evenly.
- If you prefer a less sweet cake, reduce the powdered sugar by 1/2 cup in the frosting.
- Ensure the cake is fully cooled before slicing to avoid the frosting melting too much.
- Store leftovers covered in the refrigerator for up to 5 days.
- Prep Time: 15 minutes
- Cook Time: 50 minutes
- Category: Dessert
- Method: Baking
- Cuisine: American
Nutrition
- Serving Size: 1 slice (1/12th of cake)
- Calories: 480
- Sugar: 38g
- Sodium: 250mg
- Fat: 28g
- Saturated Fat: 12g
- Unsaturated Fat: 14g
- Trans Fat: 0.5g
- Carbohydrates: 52g
- Fiber: 3g
- Protein: 7g
- Cholesterol: 65mg
Keywords: Reese’s cake, peanut butter cake, chocolate peanut butter dessert, earthquake cake, chocolate fudge cake, cream cheese frosting
