Description
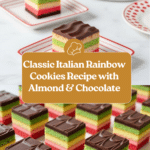
Italian Rainbow Cookies are a vibrant and festive layered almond cake, traditionally made with almond paste and dyed layers of red, green, and plain batter. These delightful cookies are sandwiched with apricot jam, glazed with smooth melted chocolate, and artfully decorated, making them perfect for holiday celebrations or any special occasion.
Ingredients
Scale
For the Cake:
- 3/4 cup (195g) homemade almond paste, cold from the refrigerator
- 3/4 cup (149g) granulated sugar
- 1/4 teaspoon table salt
- 6 tablespoons (85g) unsalted butter, at room temperature
- 3/4 teaspoon almond extract
- 3 large eggs
- 1 1/4 cups (150g) King Arthur Unbleached All-Purpose Flour or King Arthur Gluten-Free Measure for Measure Flour
- Red food coloring
- Green food coloring
For the Filling:
- 1/2 cup (170g) apricot jam, divided
For the Glaze:
- 1 cup (170g) semisweet chocolate wafers or bittersweet chocolate wafers, divided
Instructions
- Preheat and Prepare Pans: Preheat the oven to 350°F. Lightly grease three 8″ square pans or line each with parchment slings. If only one pan is available, layers will be baked sequentially.
- Mix Almond Paste and Sugar: Break almond paste into chunks and place in a large bowl or stand mixer bowl. Add sugar and salt; mix with an electric hand mixer or stand mixer’s flat beater until the paste breaks down to a sandy texture and uniform small pieces.
- Add Butter and Almond Extract: Add the softened butter and almond extract; beat the mixture until slightly fluffy and lightened in color, scraping sides as needed.
- Incorporate Eggs: Add eggs one at a time, fully mixing each before adding the next to create a smooth batter.
- Add Flour: Add the all-purpose or gluten-free flour and mix until the batter is smooth.
- Divide Batter: Divide batter into three equal parts: approximately 1 cup (235g) into two medium bowls and leave the remainder in the mixing bowl.
- Add Food Coloring: Add red food coloring to one bowl and green to the other, leaving one portion plain.
- Spread Batter in Pans: Evenly spread each colored batter into prepared pans using a small offset spatula; layers will be thin. If baking sequentially, bake plain layer first, then green, then red, cooling the pan between layers.
- Bake Layers: Bake each layer for 9 to 11 minutes until the cake springs back to the touch and looks dry in the center.
- Cool Cake Layers: Cool cakes in the pans for 10 minutes, then turn out onto racks to cool completely. Ensure all layers are fully cooled before assembling.
- Assemble with Jam: Spread 1/4 cup (85g) apricot jam evenly over the green layer, place the plain layer on top with firm pressure, then spread the remaining 1/4 cup jam on the plain layer and top with the red layer, pressing firmly to sandwich all three layers together. Wrap tightly in plastic wrap.
- Compress Layers: Place wrapped layers in a larger pan and place an 8″ square pan on top. Weight it down with 4 to 6 heavy cans or comparable weights to compress the layers. Refrigerate overnight.
- Melt Chocolate for Top Glaze: Remove cake layers from fridge and unwrap. Place green layer down on cutting board. Melt half of the chocolate wafers (1/2 cup/85g) in 20-second microwave increments at 50% power or over low heat in a saucepan, stirring until smooth.
- Glaze Top Layer: Spread melted chocolate evenly over the red layer, allowing some to drip down edges. Before chocolate sets, create wavy lines using a fork’s tines. Allow chocolate to set fully at room temperature or in the refrigerator.
- Flip and Glaze Bottom Layer: Flip the layers over. Melt remaining chocolate wafers until smooth and spread over the green layer. Again, create wavy lines before set and allow to fully set.
- Trim and Slice: Use a warm chef’s knife to trim edges for neat presentation. Cut the rainbow cookies into pieces, such as an 8 x 4 pattern for slices approximately 1 3/4″ x 1″ in size. Serve at room temperature.
- Storage: Store leftover cookies in an airtight container in the refrigerator for up to 2 weeks or freeze for longer storage. Allow pieces to come to room temperature before serving.
Notes
- If only one 8″ square pan is available, bake layers one at a time and allow the pan to cool completely between uses.
- Use a small offset spatula for spreading batter evenly for thin layers.
- Compression overnight is essential for the classic dense, chewy texture of rainbow cookies.
- Melt chocolate carefully to avoid burning by heating in short intervals or using low heat on the stove.
- Trimming the edges after glazing creates a clean, professional appearance.
- Allow cookies to reach room temperature before serving to enhance flavor and texture.
- Gluten-free flour can be substituted one-to-one for all-purpose flour if desired.
- Prep Time: 20 minutes
- Cook Time: 10 minutes per layer (approx. 30 minutes total if baking all three layers sequentially)
- Category: Dessert
- Method: Baking
- Cuisine: Italian
Keywords: Italian Rainbow Cookies, Almond Cookies, Layered Cookies, Festive Dessert, Apricot Jam Cookies, Chocolate Glazed Cookies