
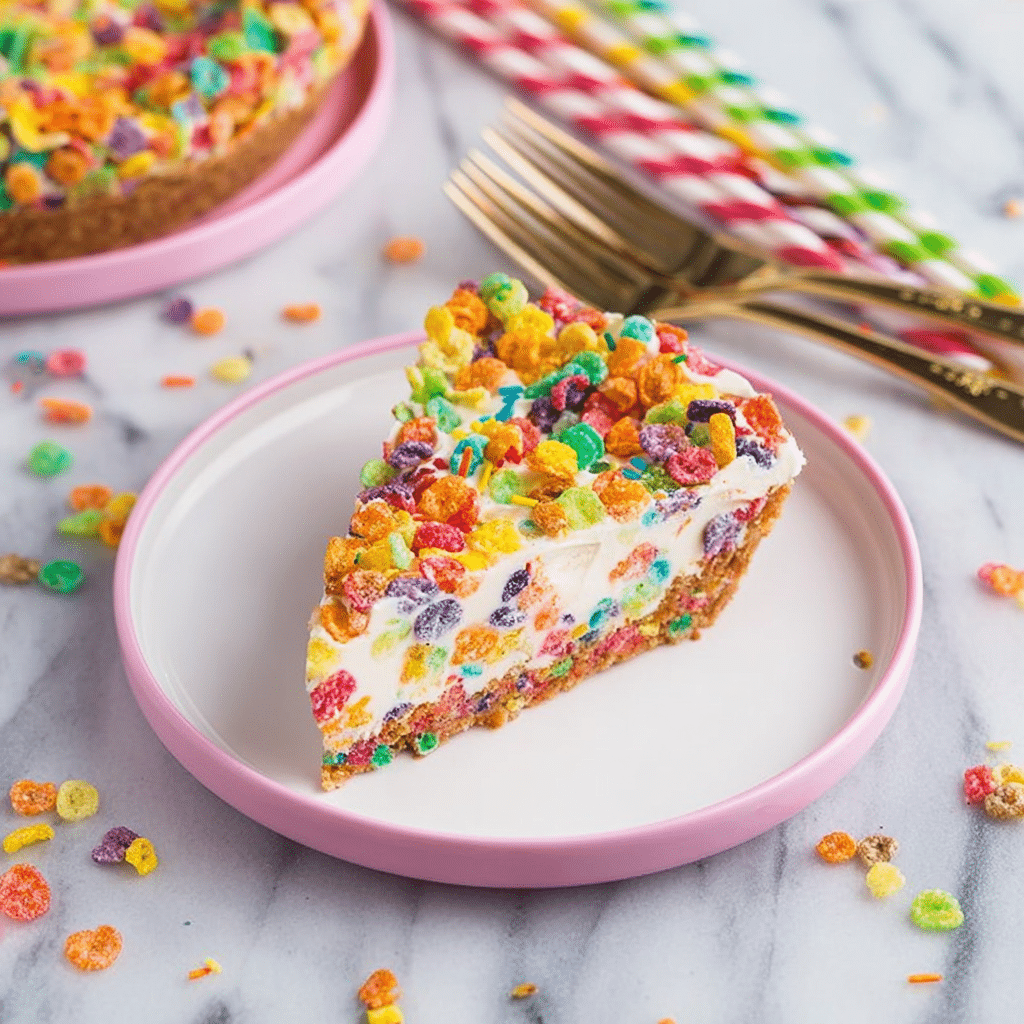
No-Bake Fruity Pebbles Cheesecake Recipe
If you are looking for a dessert that is playful, colorful, and irresistibly sweet, then you are going to fall head over heels for the No-Bake Fruity Pebbles Cheesecake. This vibrant cheesecake combines the nostalgic crunch of Fruity Pebbles cereal with a luscious, creamy filling that sets without any baking, making it perfect for warm days or last-minute celebrations. It’s a delightful twist on classic cheesecake that brings a burst of fun to your dessert table, and once you try it, you’ll be hooked on how simple and joyful baking can be.
Ingredients You’ll Need
Making this No-Bake Fruity Pebbles Cheesecake is all about combining simple but essential ingredients that each add their own magic to the final dish. From the crispy cereal that brings color and crunch to the creamy filling that’s smooth and sweet, every component plays a delicious role.
- 3 ½ cups Fruity Pebbles Cereal: The star ingredient for that iconic fruity crunch and vibrant color.
- 3 cups mini marshmallows: These melt beautifully to help bind the crust together with gooey sweetness.
- 2 tablespoons unsalted butter: Adds richness and helps the crust hold its shape.
- 16 oz cream cheese (softened): Creates the smooth, tangy base of your cheesecake filling.
- ¼ cup powdered sugar: Sweetens the filling perfectly without graininess.
- 1 teaspoon vanilla: Enhances the overall flavor with warm, fragrant notes.
- 7 oz tub marshmallow creme: Adds extra lightness and sweetness to the filling.
- 1 ½ cups Fruity Pebbles cereal (lightly chopped): Folded into the filling for bursts of crunch inside the cheesecake.
How to Make No-Bake Fruity Pebbles Cheesecake
Step 1: Create the Fruity Pebbles Crust
Begin by combining the Fruity Pebbles, mini marshmallows, and butter in a large microwave-safe bowl. Heat them uncovered on high for two to three minutes — you’ll see the marshmallows puff and melt, which is exactly what you want. Once melted and sticky, stir everything together so the cereal is evenly coated, then transfer this mixture into your pie plate. Press it down firmly and up the sides to build a sturdy crust. This crust will hold your cheesecake together with a sweet, crispy texture that’s impossible to resist.
Step 2: Prepare the Creamy Filling
In a separate large bowl, blend the softened cream cheese, powdered sugar, and vanilla until silky smooth. Then, mix in the marshmallow creme to add that cloud-like fluffiness and extra sweetness. Finally, gently fold in the chopped Fruity Pebbles cereal, giving the filling lovely pops of cereal crunch throughout. This mixture is where the cheesecake’s rich creaminess shines while celebrating the iconic fruity flavor.
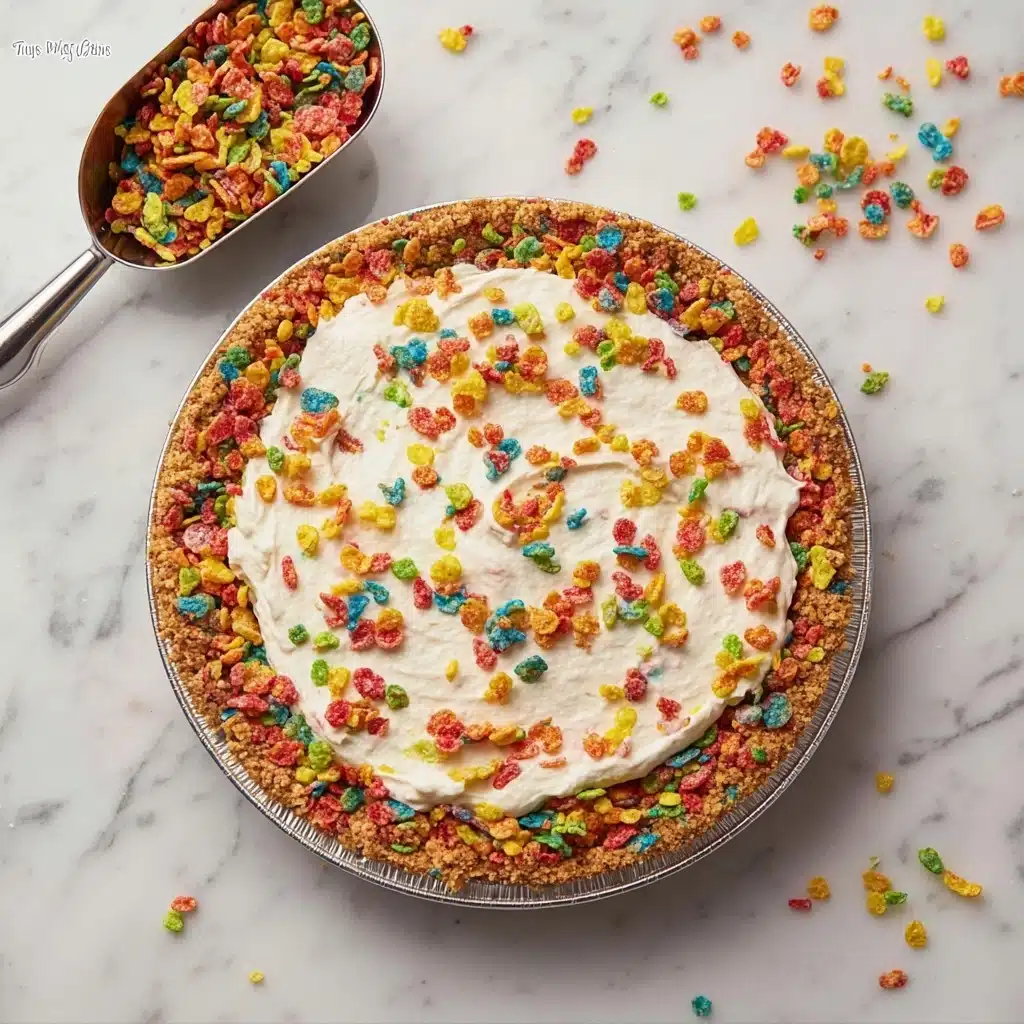
Step 3: Assemble and Chill
Pour the filling over your prepared crust, smoothing the top with a spatula to create an even surface. Pop your cheesecake into the refrigerator and let it firm for at least 1-2 hours. If you’re short on time, a quick 30-minute chill in the freezer works wonders to set the filling. This chilling step is essential as it lets all those flavors meld together while the texture thickens to perfect cheesecake consistency.
Step 4: Add the Final Touches
Once set, feel free to sprinkle extra Fruity Pebbles or colorful sprinkles on top for a festive finish. This not only makes the cheesecake look irresistible but also adds a little crunch and color that echoes the crust and filling. Your No-Bake Fruity Pebbles Cheesecake is now ready to impress!
How to Serve No-Bake Fruity Pebbles Cheesecake
Garnishes
A simple dusting of extra cereal or a scattering of rainbow sprinkles instantly amps up this dessert’s fun factor. Whipped cream dollops or a drizzle of white chocolate can also add a touch of elegance while complementing the marshmallow sweetness perfectly.
Side Dishes
Pair this cheesecake with fresh fruit, like sliced strawberries or kiwi, for a refreshing balance. A scoop of vanilla ice cream alongside can also be heavenly, providing cool creaminess that contrasts beautifully with the cereal’s crunch.
Creative Ways to Present
Try serving the cheesecake in individual clear cups or mini mason jars to highlight the distinct layers and radiant colors. For parties, cut into fun shapes using cookie cutters or offer a cheesecake bar where guests can add their own toppings—it’s a guaranteed crowd-pleaser!
Make Ahead and Storage
Storing Leftovers
Store any leftover No-Bake Fruity Pebbles Cheesecake covered in the refrigerator for up to 3 days. Make sure to keep it tightly sealed to preserve the crunchy texture of the cereal and the creamy filling’s freshness.
Freezing
This cheesecake freezes well for up to 1 month. Wrap it securely in plastic wrap and then in foil before freezing. When ready, thaw overnight in the refrigerator to maintain its delightful texture without ice crystals.
Reheating
Since this is a no-bake cheesecake, reheating is not recommended as it changes the texture. Instead, enjoy it chilled for the best flavor and consistency every time.
FAQs
Can I use a different cereal instead of Fruity Pebbles?
Absolutely! Cheerios, Fruity Loops, or even Cocoa Pebbles can work wonderfully, each bringing their own unique flavor and color to the cheesecake.
Do I have to use marshmallow creme?
The marshmallow creme adds lightness and sweetness to the filling, but if you’re out, whipped cream or additional cream cheese with extra powdered sugar can be substituted for a slightly different texture.
How long does it take for the cheesecake to set?
Typically, 1-2 hours in the refrigerator is enough for the cheesecake to firm up nicely, but if you’re in a hurry, freezing it for 30 minutes also works well.
Is this dessert suitable for kids?
Definitely! The colorful cereal and sweet, creamy texture make the No-Bake Fruity Pebbles Cheesecake a big hit with kids and adults alike.
Can I make this cheesecake gluten-free?
Yes, Fruity Pebbles cereal is naturally gluten-free, so as long as other ingredients are gluten-free certified, this recipe can be enjoyed by those avoiding gluten.
Final Thoughts
If you want to bring some vibrant color, fun textures, and simple no-bake magic to your dessert lineup, the No-Bake Fruity Pebbles Cheesecake is your go-to recipe. It’s an absolute joy to make and an even bigger joy to share, so don’t hesitate to whip one up and watch it vanish at your next gathering. You’re going to love how this nostalgic treat puts a cheerful twist on traditional cheesecake!
Print
No-Bake Fruity Pebbles Cheesecake Recipe
- Total Time: 1 hour 20 minutes (including chilling time)
- Yield: 8 servings 1x
- Diet: Vegetarian
Description
This No-Bake Fruity Pebbles Cheesecake is a vibrant, fun dessert combining the colorful crunch of Fruity Pebbles cereal with a creamy, fluffy cheesecake filling, all set atop a sweet and chewy marshmallow crust. Perfect for a quick and easy treat that requires no baking, blending nostalgic cereal flavors with a classic cheesecake texture.
Ingredients
Crust
- 3 ½ cups Fruity Pebbles Cereal
- 3 cups mini marshmallows
- 2 tablespoons unsalted butter
Filling
- 16 oz cream cheese, softened
- ¼ cup powdered sugar
- 1 teaspoon vanilla extract
- 7 oz marshmallow creme
- 1 ½ cups Fruity Pebbles Cereal, lightly chopped
Instructions
- Prepare the crust: In a large microwave-safe bowl, combine the Fruity Pebbles cereal, mini marshmallows, and unsalted butter. Microwave uncovered on high for 2-3 minutes, watching as the marshmallows puff up and soften.
- Mix and press crust: Carefully remove the bowl from the microwave and stir the ingredients vigorously until the cereal is fully coated with the melted marshmallows and butter. Immediately transfer this mixture to a lightly sprayed or buttered pie plate, pressing it evenly into the bottom and up the sides to form a crust. Set aside to firm.
- Make the cheesecake filling: In a large mixing bowl, beat together the softened cream cheese, powdered sugar, and vanilla extract until smooth and creamy. Fold in the marshmallow creme until fully incorporated and the mixture is fluffy.
- Incorporate cereal into filling: Using a spatula, gently stir the lightly chopped Fruity Pebbles into the cheesecake filling to evenly distribute them without crushing the cereal.
- Assemble and chill: Pour the filling over the prepared crust, smoothing the top with a spatula. Refrigerate the assembled cheesecake for at least 1-2 hours to allow it to firm up. Alternatively, you can place it in the freezer for about 30 minutes for a quicker set.
- Garnish and serve: Before serving, sprinkle additional Fruity Pebbles cereal or colorful sprinkles on top for an extra pop of color and texture.
Notes
- Ensure the cream cheese is softened to room temperature for a smooth filling.
- Microwave times may vary; watch marshmallows carefully to avoid burning.
- The cheesecake can be stored covered in the refrigerator for up to 3 days.
- For a firmer cheesecake texture, chill overnight.
- Optional: add a drizzle of white chocolate or a layer of whipped cream on top for extra indulgence.
- Prep Time: 15 minutes
- Cook Time: 3 minutes (microwaving)
- Category: Dessert
- Method: No-Bake, Refrigerated
- Cuisine: American
Nutrition
- Serving Size: 1 slice (1/8 of recipe)
- Calories: 310 kcal
- Sugar: 22 g
- Sodium: 170 mg
- Fat: 20 g
- Saturated Fat: 11 g
- Unsaturated Fat: 7 g
- Trans Fat: 0 g
- Carbohydrates: 29 g
- Fiber: 0.5 g
- Protein: 4 g
- Cholesterol: 45 mg
Keywords: no bake cheesecake, fruity pebbles dessert, easy dessert, cereal cheesecake, marshmallow crust, colorful cheesecake
